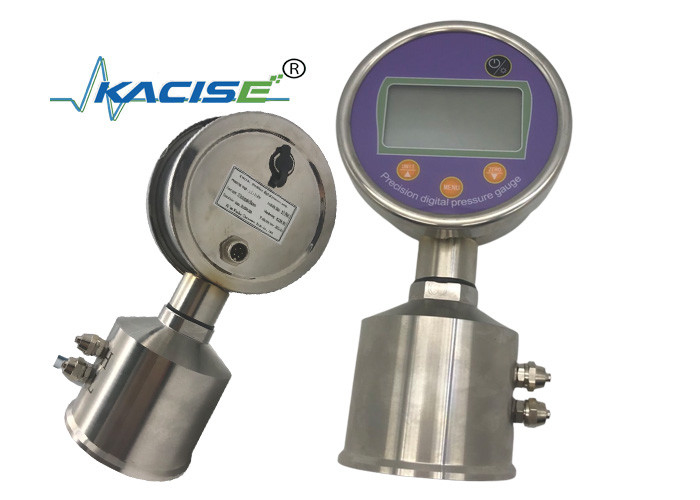
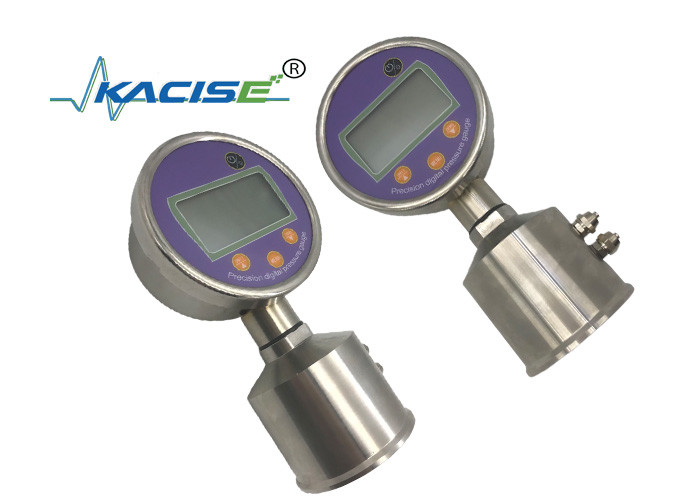
Kacise hight accuracy 0.1% Battery powered stainless steel LCD digital display pressure gauge

1. Overview
KPG201C precision digital pressure gauge uses high-precision low-power large-scale integrated circuit as the core device, which is mainly composed of high-precision measuring chip, battery charging protection circuit, sensor and signal processing circuit.
The product uses a microprocessor to automatically compensate and correct the zero drift of the instrument, non-linearity, etc., and uses high-performance devices such as high-stability pressure sensors to ensure the accuracy and reliability of the instrument. The meter can set various function parameters by itself, the application is flexible, and various functions can be selected. Up to 11000 pieces of data can be stored, and the storage time can be set by itself.
2. Features
1) Various parameters can be set according to user requirements anytime and anywhere, and the application is flexible and convenient.
2) Special function pressure gauges can be customized according to user requirements.
3) The software performs temperature compensation with high precision and wide operating temperature.
3. Parameters
| Item |
Spec. |
| Pressure range |
-100kpa~250pa~5kpa~250Mpa |
| Accuracy |
0.5%, 0.4%, 0.2%, 0.1%, 0.05%, 0.02% |
| Display |
5-digit dynamic display + percentage indicator |
| Pressure unit |
Pa, kPa, MPa, psi, bar, mbar, mmH2O, mmHg, inH2O, inHg, kgf/cm2 |
| Overload pressure |
150% FS |
| Destruction pressure |
200% FS |
| Power supply |
4.2V rechargeable lithium battery |
| Temperature |
-20 ℃ ~ 60 ℃ |
| Humidity |
≤ 85% RH |
| Calibration environment |
20 ℃ ± 2 ℃ |
| Explosion-proof level |
ExiaIICT4 optional |
| IP Grade |
IP66 |
| Data record limit |
11000 |
| Process connection |
M20 × 1.5 (male), special thread customizable |
| Dimensions |
height 170mm, width 110mm, thickness 50mm |
4. Display Panel and Keys
1, Button Description
"Power" button: <1> It is used to turn the pressure gauge on and off;
<2> Exit the setting interface.
"Menu" button: <1> Long press to enter the password interface;
<2> Short press to enter the communication state.
“Zero” button: <1> Press this button to automatically correct the zero offset pressure;
<2> Set the interface down function.
"Backlight" button: <1> Short press to turn the background on and off;
<2> Up function when in the setting interface;
<3> Long press to enter and exit the storage state.
2. Display Description

5. Calibration
If the pressure display is inaccurate and pressure calibration is required, contact the company and explain to the professional.
Note: Non-professionals are not allowed to calibrate the pressure gauge to avoid serious damage to the pressure gauge.
6. Basic Function Usage
1. Power on and off
Short press “power” to turn the gauge on and off. After the power is turned on, the screen will display the range of the pressure gauge.
2. Backlight on and off
Short press “unit” to turn the backlight on/off and the color is white. The backlight turns off automatically after 5 seconds.
3. Pressure clear
Press the pressure port of the pressure gauge to the atmosphere. If the current pressure measurement value is within the zero calibration range, press “zero” to clear the measured value. If successful, “CAL-0” will be displayed.
4. Data recording
Press and hold “unit” for about 5 seconds to start/stop the data logging function of the pressure gauge. See the description of the display, if the storage mark is showed, it means that it is currently in the storage state, otherwise it will not be stored. If the storage is full, the pressure gauge will display “FULL”.
Note: The storage state is automatically exited after rebooting.
5. Communication
Before communicating, first, connect the pressure gauge to the computer, then press the menu button to enter the initial USB operation. If “OK” is displayed, the computer software will be opened for the next step. If "LOAD" is displayed for a few seconds, then "ERR-C" is displayed for a few seconds and then returns to the normal interface, then it fails. At this time, you can change the communication line or restart the pressure gauge to operate again. After the data transfer is completed, press the open key to return to the normal interface.
Note: After entering the communication state, the pressure gauge will automatically exit the storage state.
7. Setting Menu Instructions
1). enter the menu
Before entering the setup menu, you must enter your password and the password is “503”. The operation method is as follows:
(1) Press and hold the menu button for about 5 seconds, the screen displays the input password interface “P---”; the password is input from left to right;
(2) When inputting, the up key is the number +, the down key is the number -, the menu key is determined by the number, and the password "503" is entered in order to enter the setting interface.
Note: If the password is entered incorrectly, “Err-0” will be displayed and return to the normal interface.
2). set the menu options
There are 2 options in the setup menu, which are:
1-Int 2-Mod
Explain as follows:
(1) <1-Int> Execute this item to set the storage interval time;
(2) <2-Mod> Execute this item to set the mode of the pressure gauge.
Press the “backlight” and “zero” keys to select the above two options, press the “Menu” button to enter the selected item settings, and press the “ Shutdown ” button to return to the normal interface.
3). set the storage interval
After entering this interface, the current storage interval time (in seconds) is displayed. Press the “Menu” button, the first digit flashes, press the “Backlight” and “Correct Zero” keys to add/subtract the number. The first bit is set. After that, press the “Menu” button to enter the second setting. After the setting is completed, if the number is within the range of (1-7200), it will store and return to the previous interface. At this time, the setting is completed. If it is outside the range, it will be displayed. "Err-0" and return to the previous interface, which is still the last setting data. Press the "Shutdown" button at any time to exit the current operation and return to the previous screen.
Note: The factory default measurement speed of the instrument is 0010 (10 seconds once)
4). mode setting
After entering this interface, the current mode is displayed. Press “Backlight” or “Zero” to switch the mode. After selecting, press the “Menu” button to complete the setting and return to the previous interface.
Select Mod1, the pressure sampling frequency of the pressure gauge is 1 second;
Select Mod2, the pressure sampling frequency of the pressure gauge is the set storage interval time.
The up arrow is the mode flag, which is displayed as Mod2 and is not displayed as Mod1.
Under normal circumstances, if you want to check the pressure gauge, you can use Mod1. The pressure sampling frequency of Mod2 is related to the set storage interval.
Note: When using the storage function, it is recommended to use Mod2 to extend the battery life. The mode has an automatic save function, and automatically enters the setting mode before the last shutdown after rebooting.
8. Storage Function Operation
1. data deletion
After entering the password input interface, enter the password “600”, press the “Menu” button, the pressure gauge displays “OK”, the data deletion is completed and the normal interface is returned.
2. view the time
After entering the password input interface, enter the password “601”, the pressure gauge will display “year-month-day-hour-minute-second” in turn and automatically return to the normal interface.
3. view the number of records
After entering the password input interface, enter the password “602”, the pressure gauge will display the number of data currently stored and automatically return to the normal interface.
9. Installation and Maintenance
1. installation
1) The meter should be installed in a vertical horizontal plane.
2) Pay attention to the matching of the pressure range when using with a pressure pump or other instruments.
3) At 0 pressure, if the digital pressure gauge display is not 0, in order to ensure the accuracy of the measurement, please use the “Zero” button to perform zero calibration.
4) Before installing the digital meter on the device, check if the header is clean. Keep the tubing clean during use.
2. maintenance
1) The instrument is a high-precision measuring instrument, which should be selected in the air circulation, easy to observe, easy to maintain and operate.
2) Although the digital pressure gauge can over pressure 1.2 times during use, it will affect the accuracy of the measurement and damage the instrument. It is recommended that the user use the meter according to the range.
3) When the precision digital pressure gauge LCD screen shows that the battery voltage is a space, please charge it immediately to ensure the normal operation of the measurement. Shut down when charging, the charging time is 3~4 hours.

 Your message must be between 20-3,000 characters!
 Please check your E-mail!
  Your message must be between 20-3,000 characters!
 Please check your E-mail!


